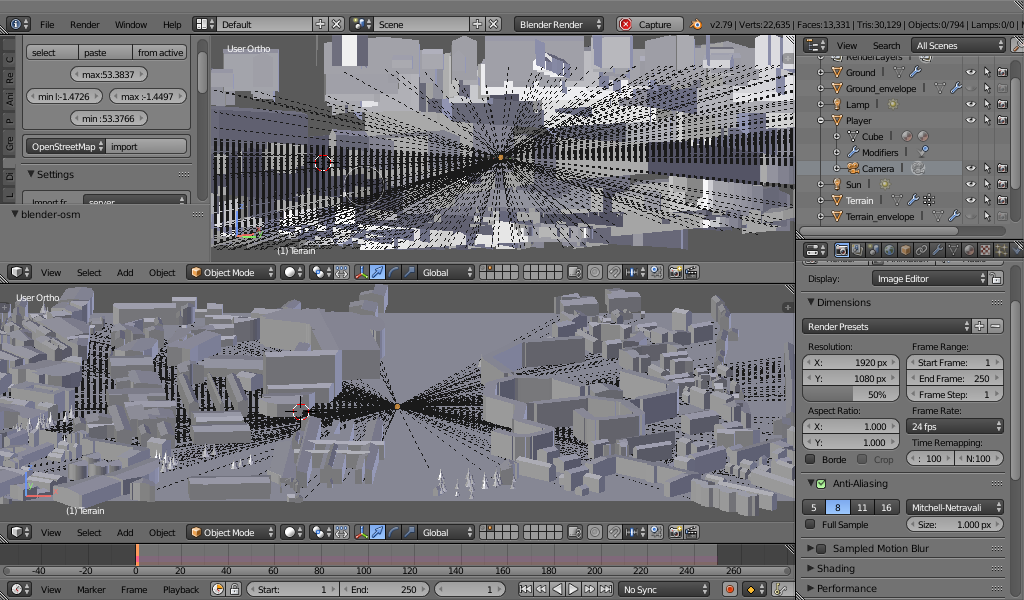
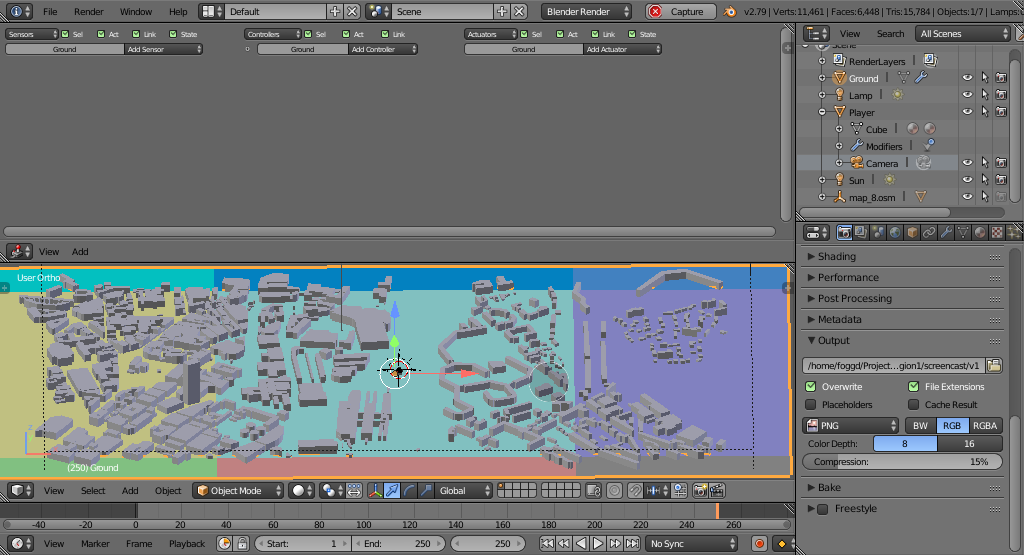
Sheffielders will recognise the area, but it doesn’t look right – does it?
In reality, the region in the middle isn’t flat – they’re connected by Park Square Bridge, and has a busy road below it (and there aren’t any roads)
I’ve purposely selected this area to show how they are interpreted (at least on my machine) – I strongly suspected that this feature does work in the addon, but it is too intensive for my netbook to run.
In the real world, there is a complex road system, and a tramline and a trainline that run alongside it – even a bridge to connect the tramline into the city center and beyond.
What also isn’t shown, is that there is Park Square Bridge connecting the two areas.

This does bring me on to another method I have been using to work around this, at the moment unsuccessfully: though I have been busy with work.
There’s not really much I am allowed to say about my job , so I won’t say anything.
These are hobbyist projects I’m working on in my own free time and volition, the two are completely separate and I intend to keep it that way.
I digress, the other method I’ve been using is a free package called OSM2World. This is a small Java tool that scrapes OSM data from OpenStreetMap, much the same as the Blender addon from my last post
I had hoped that using this tool would be much more lightweight than having a full Blender session open, and less demanding on system resources. I’ve tried running in an ultra-minimal window manager (my firm favourite, i3.) – but still, it crashes once half way through terrain generation.
In this article, I’m going to be using a free piece of software called OSM2World; currently in my development process, I plan to use a hybrid of exporting OSM files from this application and blender-osm to import into Blender: the reason for this, is that I want a copy of the geographic data I’ve downloaded, and not for it to be embedded in my Blender savefile.
I’m assuming you have downloaded and installed the packages from the Requirements area of the post; if you are wanting to play along, if not – that’s cool, too. I don’t want to go too deep in the installation here, and entrust the relevant applications’ documentation will get you where you need to be if you get lost.
Open OSM2World, and you’ll have a black screen with a menu bar along the top. If you have already selected your region, and downloaded a file from the OpenStreetMap website, you can open this with File -> Open and selecting the file.
I already have one, but for the purposes of the exercise, I’m going to redownload it through the application.
Select File -> Download OM data:
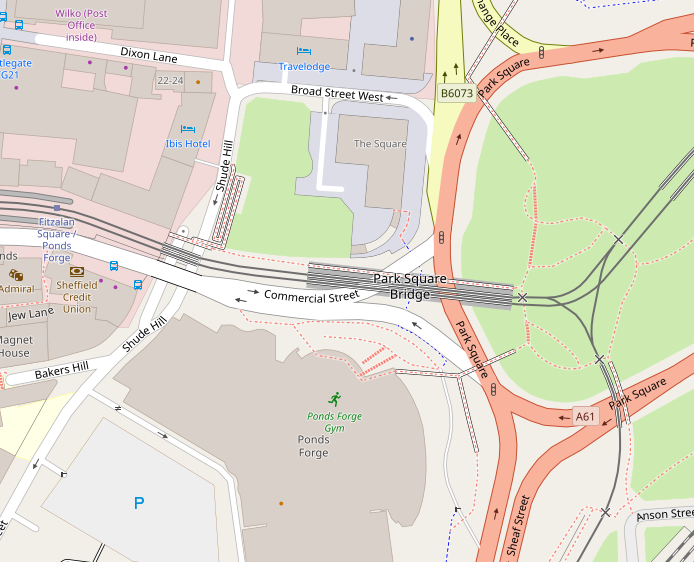
On the test I did with blender-osm, I used these latitude and longitude parameters:
Min-Lat: 53.3766, Min-Lon: -1.4726 / Max-Lat: 53.3837, Max-Lon: -1.449
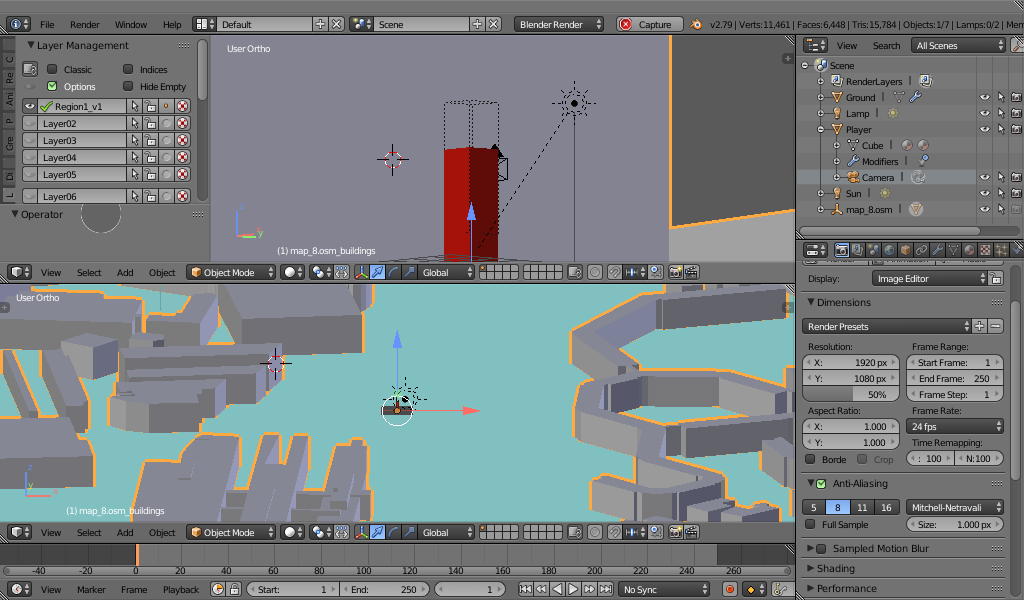
As it stands, this is as far as I have gotten with the level editing portion of the game, knowing that until I can generate the correct terrain height-maps, it’d be pointless modelling the buildings. Again, I revist the idea of having a set number of maps and levels but can’t let go of the free-roaming idea, and don’t want to have to break it down.
I have set my sights towards having a control system. At the moment, I have a rudimentary WASD and MouseLook enabled, and can (sluggishly) walk through the city. I perhaps need to look at optimisation and culling of objects that aren’t in view.
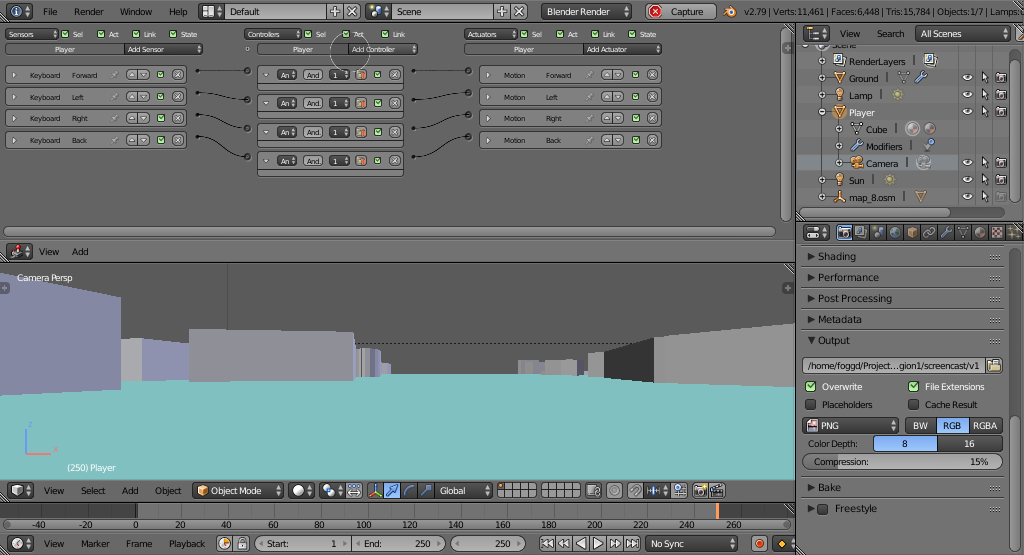
This kind of works, but I really need to slow everything down as far as the movement, you run through entire streets in seconds!
Solarus
This has been so much fun to play with! It’s a Zelda-alike RPG maker; which doesn’t come bundled with any Zelda assets, but they are downloadable from their website – and there is a big community fanbase that are doing fantastic work with reinventing Zelda games with this software.
I’ve been using it for something a little bit different, I’ve downloaded a tileset from vgmaps.com of Beavis and Butthead on the Gameboy, brought it into GIMP, and have gone around selecting any portions of the map which are tileable, and creating a tileset from it, and importing it back into the game.
Bananaman reboot
I’ve been waiting ages for a Bananaman reboot, and nobody has made one – so I want to make my own: to draw comparison for where I’d like to take it, would be a cross between The Tick and Love, Death and Robots.
Short videos utilising existing storylines from Beano and Funday Times comics, each episode has two stories and no two animation styles are the same.


Which do you prefer? Should episode titles vary in the fonts? Leave a meaningful comment to share your views so I don’t overlook it as Spam.
For inspiration, I selected a lot of images and pasted them all into one big reference sheet, so that with it imported into Blender as an image – I can quickly look around and use the colour picker to ensure I use accurate, canonical data from the original source.


Recent Comments