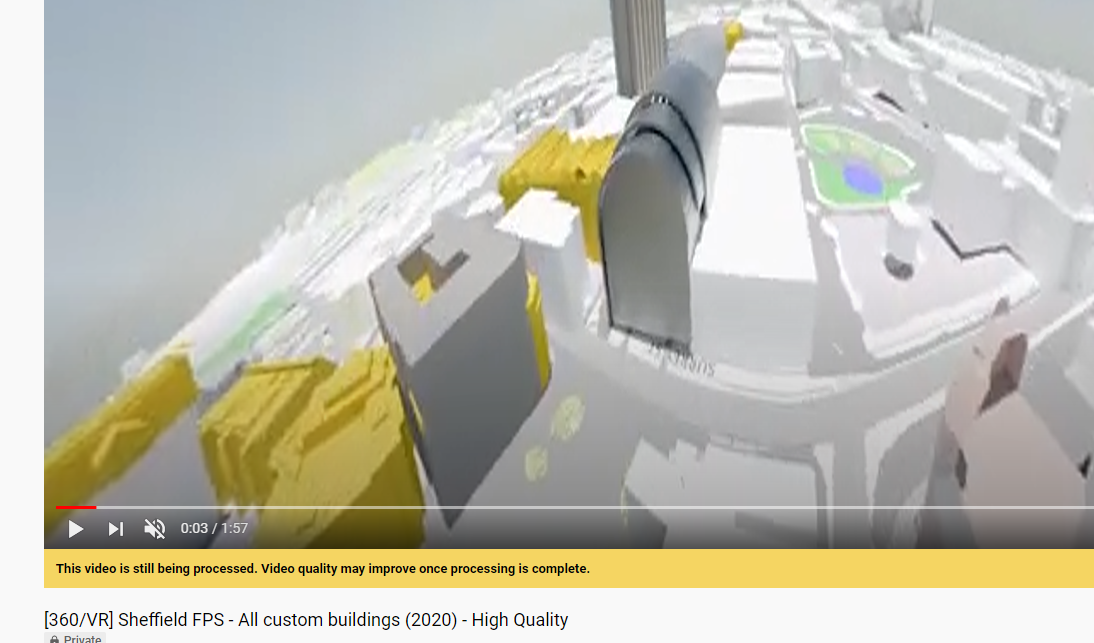
This is the same video as the last upload (here’s to re-using content!) – though a totally separate re-render of the scene in panoramic, 360° with Stereoscopy enabled, so if you have an old-school pair of 3D glasses, you can try it out.
If not, enjoy some Inception type animation of the city of Sheffield rolling around, little planet style, while looking around the city.
The quality isn’t brilliant on this one, the basic function worked – but I’d skimped on enabling denoising features in hope of a quicker render, but sacrificed quality.
As a proof of concept, I acheived what I’d set out to do and I’m now working on a higher -quality render that is more usable.
The process
To start out, I set the frame size to 2048×1024- this is because the image needs to be a square, and in this attempt I’d rendered it as Top/Bottom.
When we come to render our final scene, it’ll need to be 2048 x 2048 to include both the top and bottom view.
Enable this by going into View Layer Properties, and enabling the Stereoscopy tick-box. Set the option to Stereo 3D, and scroll down to the Views Format – and change this to Stereo 3D -> Top/Bottom (this will be important later)
.Right now, it’ll all look out of proportion – and that’s normal.
Now, we’re going to set up the Camera to render a 360 degree panorama.
Select your camera, and choose the Object Data Properties (the icon looks like a green film camera).
I used the settings below:
Lens
Type: Panoramic
Panorama Type: Equirectangular
Latitude Min: -90
Latitude Max: 90
Longtitude Min: -180
Longitude Max:180
Lat/Lon is the same way we measure GPS co-ordinates of the Earth.
It denotes an invisible horizontal and vertical line, and where they coalesce is the GPS co-ordinate.
Shift X: 0.090
Shift Y:0.030
This is camera shift
How off-axis it is from dead-center, X is horizontal and Y is vertical.
Clip Start: 0.1
Clip End: 1000m
Clipping is how far you can see.
The closest real-world explanation would be near and far sighted, clip start is how far infront of your face you can see (10cm) to how far into the distance you can see (1km)
Stereoscopy
I’d also recommend setting the Mode under Stereoscopy to Off-Axis, and adjust the Converge Plane and Interocular distance manually depending on your scene.
This can be quite an in depth subject, and pertains to where we intend the viewers focus to be (Converge Plane) – and how close the objects are to the viewer, distance between eyes etc.
I won’t go into it here, because I’ve no idea how to explain it in a way that’ll make sense.
In a sentence, it’s how far away from you the object is – and the distance between your eyes (this is important for Anaglyph rendering; how far apart the red/blue or red/green lenses are if you’re looking through a pair of 3D glasses).
I’ve used
Convergene Plane Distance: 0.31m
Interocular Distance: 0.01m
SHEEPIT
Sheepit is a distributed-rendering service, where members of the community use their idle computing power to render other members 3D renders.
The more time you dedicate to picking out items from the queue, and rendering 3D scenes for other users, the more points you are awarded – I’ve a stockpile of points because I’ve had this software running for days, but not had any projects that I’ve uploaded.
To give you an idea:
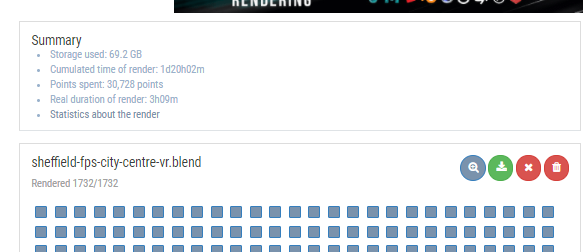
With distributed rendering, it took 3 hours. A massive improvement, eh?
This is what’s called a ‘render farm’
You’ll notice from the first video that the quality was awful.
I bumped it up in the settings of my .blend file: enabled denoising, more render passes (each render pass adds another layer of light calculation).
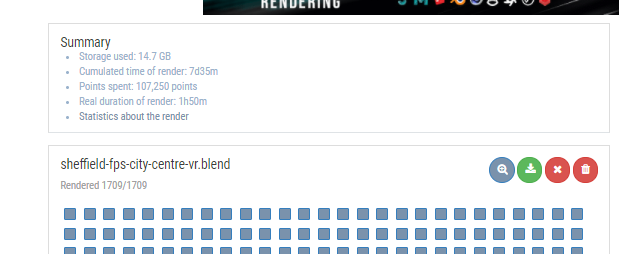
Curiously, the filesize and render time is a lot lower – despite being higher quality, but I spent a significant amount more points.
BLENDER
So I’ve downloaded the .zip file containing all of the frames, and brought it back into Blender.
That’s right, I use the Video Sequence Editor to edit all of my videos, even across the Blender community – I’ve found no love for their video editor, but I’ve used it comfortably for many many years, and don’t feel the need to switch to, or buy any additional software.
I rendered it at 2048 x 2048. It has to be square, or else it will not work: if it isn’t square, viewers will see black out of bounds areas when you upload to YouTube, and the illusion will be lost.
When finished, your video should look like the old split-screen video games you used to play on the same TV, with two exact same views on the top and bottom
That’s normal.
Be sure to save it as an MP4/MOV container
Uploading to youtube
Naturally, you’re going to want to upload your video to YouTube.
YouTube have a helpful guide on uploading 360 and 180-degree content, and they recommend an application called Spatial Media Metadata Injector (it’s a bit of a mouthful, so I’m going to call it SMMI from here on in).
What this application does is take your 360-degree video you’ve just rendered, and inject data into it which makes it compliant with YouTube VR, and tell it how to understand the co-ordinates.
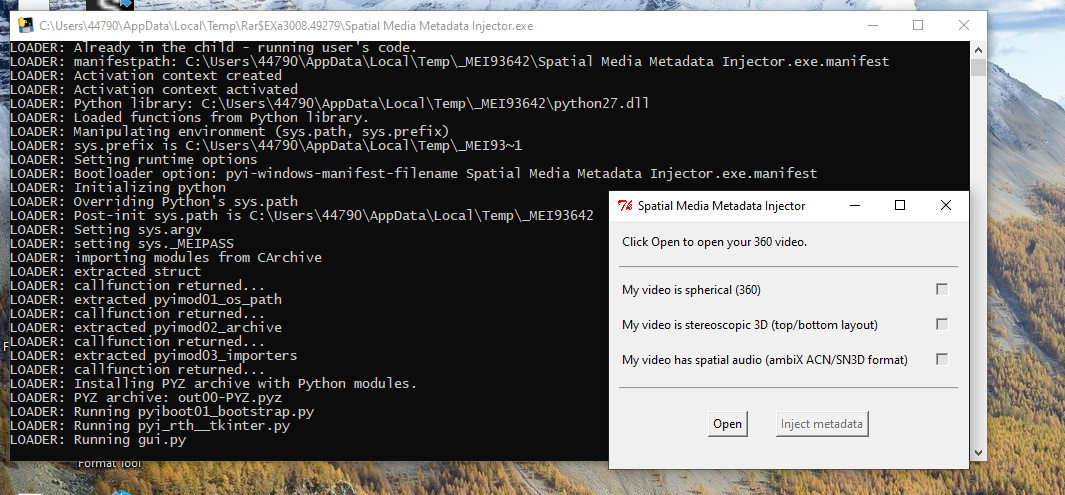
If you’ve not set up spatial audio, which is 3D surround sound, you’ll just need to open your video file, and click the first two checkboxes, and import metadata.
It’ll save a separate file named yourfilename_injected.mp4.
I’ve not used spatial audio, just an audio music track – but if and when I start to use this for virtual escape rooms and detective stories, this will come in handy.
You’ll see now why it was important to render it out as Top/Bottom
This injected file it saves is the one you upload to YouTube
Things I’d have done differently
– Enabled denoising so the image isn’t as brash and messy, and looks a lot sharper.
This was one of the features I’d disabled to speed up render time, and the image looks poor quality.
– Set Path Tracing to Branched Path Tracing in the render settings for sharper surfaces.
This gives everything a much sharper look, I’ve enabled it for the frame below and you can see how much clearer it is.
![The Roebuck [Images]](https://usercontent.one/wp/www.thefan.uk/wp-content/themes/stylizer/img/thumb-medium.png)
Recent Comments